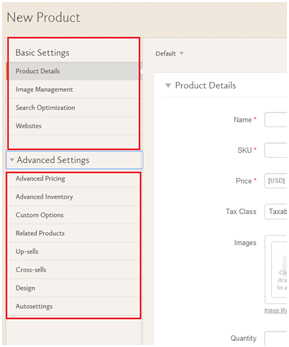
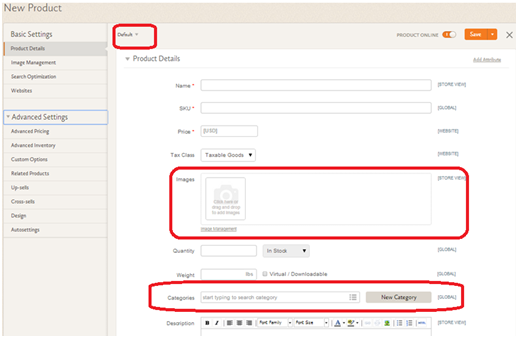
REST API is the one of the web service in the magento C.E. Using this web service, developer can perform the request and receive the response. The below section describe about, how we can set the Rest API in magento C.E.
Before going to configuration, first install the php extension oAuth in your server.
For working with REST Api, do the following step
Configuring Magento REST
1. Create oAuth consumer
Magento rest service work only with oAuth authentication. For creating oAuth consumer
- 1. Go to System -> Web Services -> REST oAuth Consumer
- 2. Then click on the Add New button
- 3. Add new consumer name in the Name field of the New Consumer page. Also we can see a disabled Key and Secret field, and we can copy that value to notepad.
- 4. We can leave the Callback URL and Rejected Callback URL
- 5. Then click on the Save button

2. Create REST Role
For getting the rest service, need to get the permission for user type, so we need to create the rest role.
W can create the rest role from
System -> Webservices ->REST Role.
Magento default have two rest role, these are Customer and Guest
For creating new rest role
- 1. Go to System -> Webservices ->REST Role.
- 2. Click on the “Add Admin Role”
- 3. Add Role name in the Role Info tab of Add New role page
- 4. Then click on the “Role API resources” and select the resources.

- 5. Then click on the Save button in the right top corner.
3. Configure Resource Attribute
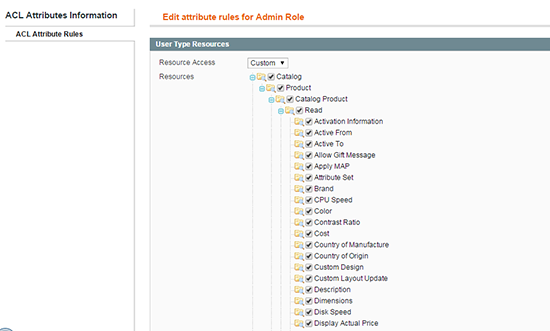
For configuring resource attribute, go to System -> Webservices ->REST – Attribute.
In the REST Attributes list page, we can see list of the user type:
- • Admin
- • Customer
- • Guest
Click on the Admin and select the Resources under the User Type Resources
4. Assign the Admin Rest Role to Admin user
For using the magento rest rule service, assign the admin rest role to existing admin user. For doing this;
- 1. Go to System -> Permissions ->User
- 2. Click on the admin user
- 3. Then select the REST Role tab from the Edit user page
- 4. Select the newly created REST Role radio button and click on the save user button.
After complete above process, you have successfully use the REST Resource. Then we can test the REST resource
Test with REST Client plug-in.
We can simply test the rest resource with firefox browser. If firefox have rest plug-in,
- 1. Open the Rest Client plug-in
- 2. Enter the http://yourdomain.com/api/rest/products in the URL field and click on the “SEND” button.

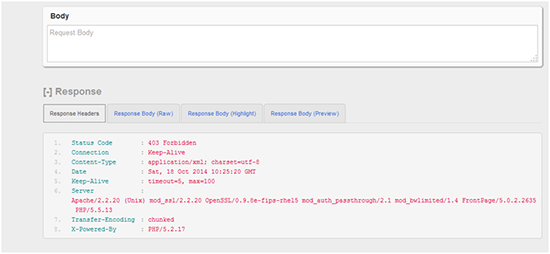
Then try with below solution,
- 1. Go to the System -> Webservices -> REST Role and select the Guest
- 2. From the Roles Resources, select the resource and save
Then
- 1. Go to the System -> Webservices -> REST Attributes and select the Guest
- 2. From the User Type Resources, select the resource and save
After complete this process check the above process again.
Note:: By default, only 10 are return during the response. We can limit the return response by
http://yourdomain.com/api/rest/products?limit=15.
Test with PHP program
Retrieve product with PHP program
<?php

$callbackUrl = "http:// yourdomain.com /oauth_customer.php";

$temporaryCredentialsRequestUrl = "http:// yourdomain.com /oauth/initiate?oauth_callback=" . urlencode($callbackUrl);

$adminAuthorizationUrl = 'http:// yourdomain.com /oauth/authorize';

$accessTokenRequestUrl = 'http:// yourdomain.com /oauth/token';

$apiUrl = 'http:// yourdomain.com /api/rest';

$consumerKey = 'yourconsumerkey';

$consumerSecret = 'yourconsumersecret';


session_start();

if (!isset($_GET['oauth_token']) && isset($_SESSION['state']) && $_SESSION['state'] == 1) {

$_SESSION['state'] = 0;

}

try {

$authType = ($_SESSION['state'] == 2) ? OAUTH_AUTH_TYPE_AUTHORIZATION : OAUTH_AUTH_TYPE_URI;

$oauthClient = new OAuth($consumerKey, $consumerSecret, OAUTH_SIG_METHOD_HMACSHA1, $authType);

$oauthClient->enableDebug();


if (!isset($_GET['oauth_token']) && !$_SESSION['state']) {

$requestToken = $oauthClient->getRequestToken($temporaryCredentialsRequestUrl);

$_SESSION['secret'] = $requestToken['oauth_token_secret'];

$_SESSION['state'] = 1;

header('Location: ' . $adminAuthorizationUrl . '?oauth_token=' . $requestToken['oauth_token']);

exit;

} else if ($_SESSION['state'] == 1) {

$oauthClient->setToken($_GET['oauth_token'], $_SESSION['secret']);

$accessToken = $oauthClient->getAccessToken($accessTokenRequestUrl);

$_SESSION['state'] = 2;

$_SESSION['token'] = $accessToken['oauth_token'];

$_SESSION['secret'] = $accessToken['oauth_token_secret'];

header('Location: ' . $callbackUrl);

exit;

} else {

$oauthClient->setToken($_SESSION['token'], $_SESSION['secret']);

$resourceUrl = "$apiUrl/products";

$oauthClient->fetch($resourceUrl);

$productsList = json_decode($oauthClient->getLastResponse());

print_r($productsList);

}

} catch (OAuthException $e) {

print_r($e);

}
Save the above code. When we call that file then list all the products in the xml format.
If you get any error like below:
          Invalid auth/bad request (got a 403, expected HTTP/1.1 20X or a redirect)

          {"messages":{"error":[{"code":403,"message":"Access denied"}]}}
Then try with below solution and check once again
Open the file https.php in the lib\Zend\Controller\Request in the magento directory and find the function
public function getHeader($header)
Modify the getHeader($header) function in Zend_Controller_Request_Http class

Replace:

$temp = 'HTTP_' . strtoupper(str_replace('-', '_', $header));

With:

$temp = ($header == 'Authorization') ? $header : 'HTTP_' . strtoupper(str_replace('-', '_', $header));
After correctly configure magento REST API, that allow managing number of features like;
Managing customers, managing products, list the sale order, managing inventory etc.


